

Chicken Seekh Kababs are a savory culinary creation that originated from the Indian subcontinent. It was made popular during the Mughal era, which was known for its rich and diverse food culture. The word “seekh” is an Hindi and Urdu word, which translates to “skewer” in the English language, and the art of taking a handful of perfectly seasoned ground chicken and perfectly molding it on to a skewer is what gives this recipe it’s name.
When seekh kababs first came on the scene, they were primarily made using minced lamb or beef. Since than, many variations of the seekh kababs were introduced, in response to changing diets and preferences. The introduction of the chicken seekh kabab was likely in response to the growing demand of poultry in our diet.
Whatever the reason was, chicken seekh kababs are here to stay!


I am sharing my personal experience with you all. I remember when I first made these kababs, these kababs meat is not sticking to the skewers and all meat was falling. I am going to share with you all the tips and tricks that I learned with experience so that you don’t make them. Believe me, once I made them properly at home, now I don’t want to eat restaurant kababs
This recipe is for Kabab lovers because we are gonna have some delicious and juicy kababs. I made these kababs at home using my simple recipe, using a griddle, which gave it a nice char, almost like a chicken burger. This recipe will be easy to follow, and I guarantee you are gonna have something much better than what you would get at the restaurant.
Just look at the char on these kababs, look at how juicy it is! It has all the ingredients that are used to make the best kababs, but when you make them at home and use home cooking oil, you will never feel heavy after eating these kababs. Neither does your stomach get upset, but you can enjoy the healthy benefits of kababs. In this recipe, I will also teach you how to make green sauce( chutney) which goes very well with these seekh kababs.
Prep Time
30 mins
Cook Time
30 mins

The recipe is for 10-12 servings. So if you have a big family and have guests coming over, this recipe will be more than enough.
As I mentioned to you about the whole spices, you have to saute all the whole spices on low flame for 10 minutes and then grind them, it gives a very nice and fresh flavor to the chicken seekh kababs
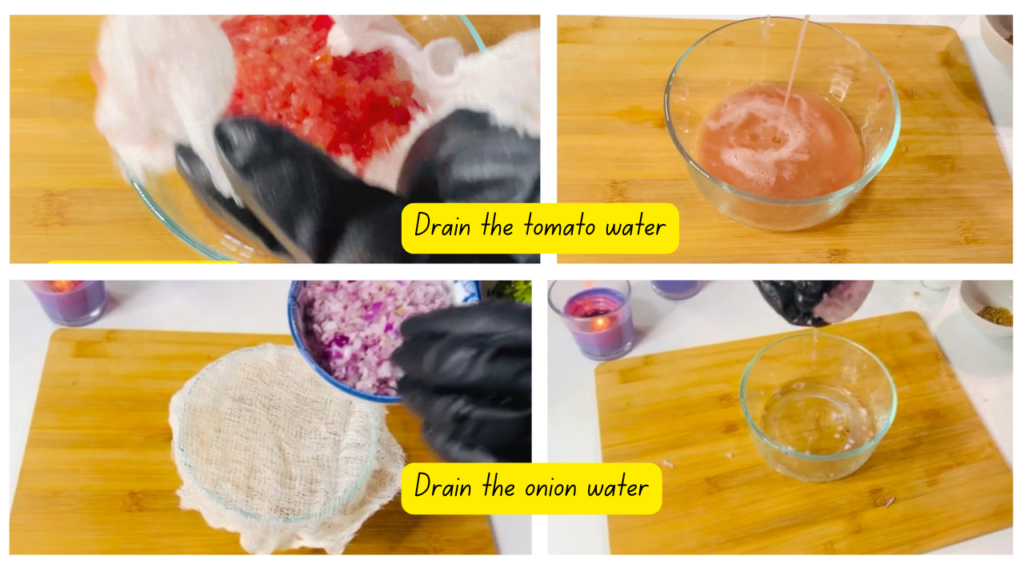
Chop the onion, tomatoes and green chilies and add them into the seekh kabab mixture. But please make sure that you have to squeeze out the water of tomato and onion and then add to the kabab mixture otherwise your kabab’s mixture will be very soft and it will not stick to the skewers
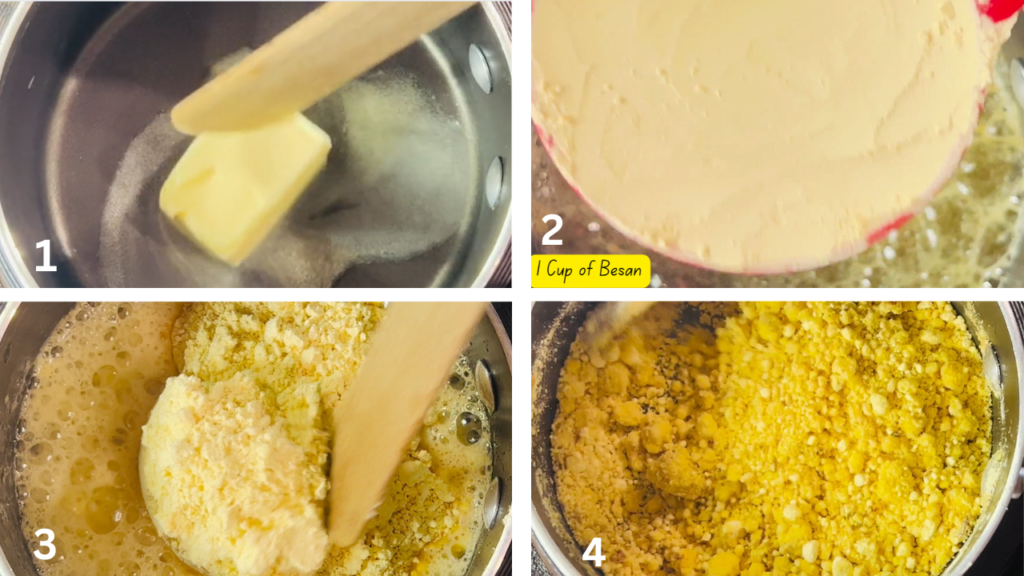
Add 2 tablespoons of unsalted butter to the pan. When the butter is melted, add the gram flour to it. And cook it until it turns light brown. This roasted butter will act as a binder, help your kababs from falling off the skewers
In this recipe, I am using 4 pounds of ground chicken and all the other ingredients are according to that quantity. But you can adjust the quantity of your ingredients according to the meat. In the ground chicken add the chopped tomatoes, chopped onion, and chopped green chilies. Then add all the spices, ginger garlic paste, roasted besan, and fresh cilantro. Also, add the whole spices after heating them on low flame for 10 minutes. When whole spices are slightly heated on low flame, it give a very fresh flavor to the kababs. After adding all the ingredients leave the marinated keema for at least 2 hours or overnight in the refrigerator for best results.
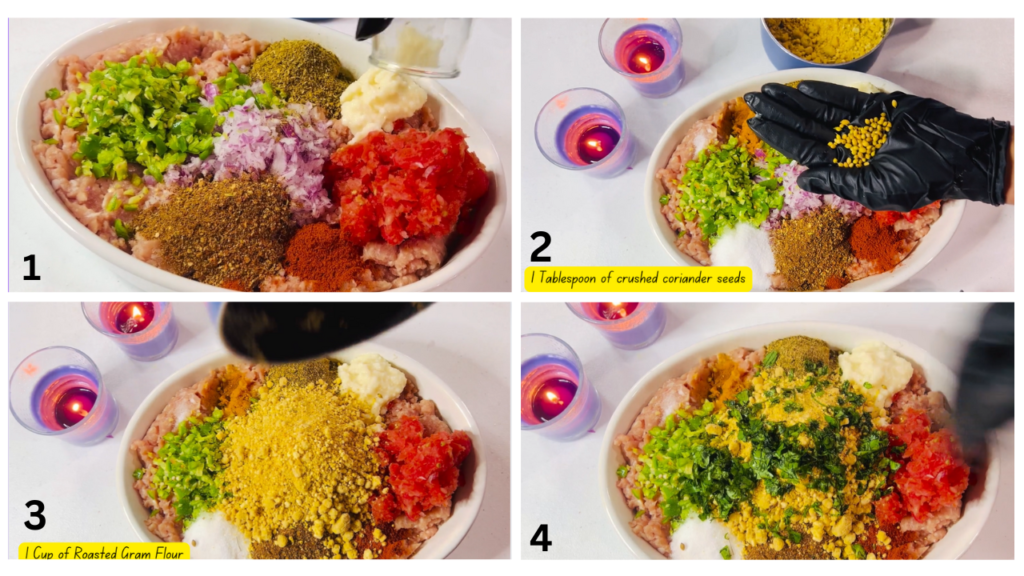
It’s time to mix everything well. After mixing leave it for at least 2 hours in the refrigerator or overnight for the best result
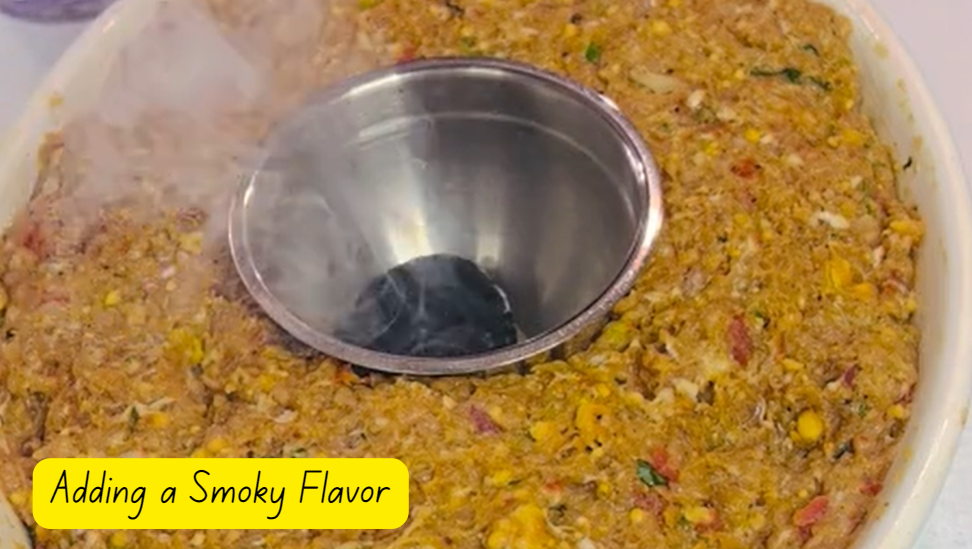
If we were to grill our kababs over a charcoal fire, the kababs would naturally absorb some of the smokey flavor from the charcoal. But since we aren’t grilling using a charcoal fire, you can simply heat up a piece of charcoal using the fire from your stove. Once the charcoal starts to release smoke, place it in a small cup or piece of aluminum foil, and place it over the kabab mixture. Cover the kabab mixture and charcoal for about 10 minutes, making sure to not let any of the smoke from the charcoal escape. This way, your kabab mixture will absorb some of the aroma from the charcoal and add a distinct smokey flavor to your kababs.
Now it’s time to cook the chicken seekh kababs. Grab a handful of meat and use the skewers to start forming the chicken seekh kababs. Wet your hands with water from time to time and keep pressing the meat evenly on the skewer to form the desired long and even shape for your kabab. Be sure to check out my video below for a great demonstration of how this is done.


Appetizer: Serve as an appetizer with a side of Cilantro Green Chili Sauce(Chutney)
Make it a meal: You can also make a meal with these chicken kebabs by serving them with paratha, garlic naan, rice, and a side of cucumber raita. Add a simple green salad to the meal and enjoy a healthy, low-calorie, flavorful feast.
For a low-carb meal: Pair it with brown rice , chutney and a side of garden salad
If you kebabs mixture is too wet then feel free to add another tbsp of besan (chickpea flour) or even some breadcrumbs.
Since chicken seekh kabab can dry out very quickly, it is essential to heat them with a little water so that the kebabs heat up through a combination of heat and steam, if using an air fryer, use a little oil or ghee to keep the kabab moist.
Refrigerator: Cooked chicken seekh kababs will last 3-4 days in the refrigerator. To reheat
Stovetop: Place the chicken seekh kababs in a pan with a splash of water or drizzle some oil. Cover and heat on low flame for about 10-12 minutes until warm, shaking the pan as needed to evenly heat the kababs.
Microwave: Place this chicken seekh kababs into a microwave-safe container with a teaspoon of water or oil and heat for 30 seconds at a time until warm. Be careful not to overheat the kababs as they will become dry
Air fryer: Place the chicken seekh kabab in the air fryer with a little oil or ghee. Airfry for a few minutes at 350F until warm.
Freezer: You can keep it in the freezer for a couple of months. You can defrost it in the microwave or leave it outside at room temperature until it defrosts and then reheat it using any of the above method


Sign up for my newsletter to see new photos, tips, and blog posts. Do not worry, we will never spam you.
Sign up for my newsletter to see new photos, tips, and blog posts.